 Sequencer Layout
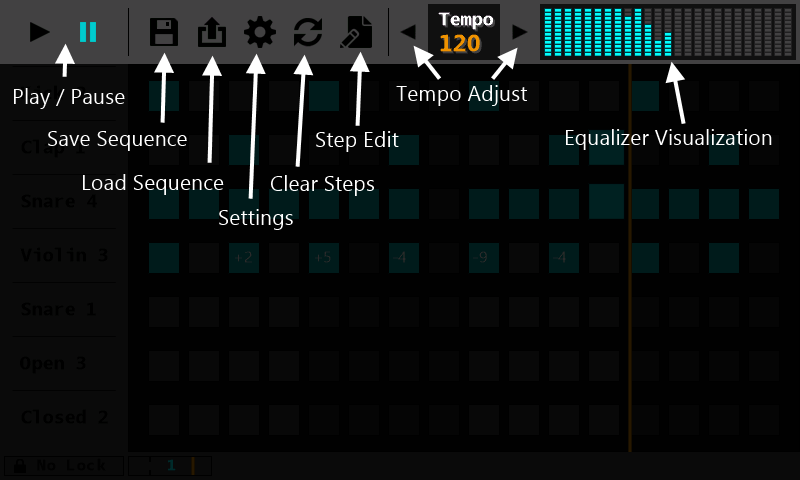
 Play/Pause:
 Use these controls to start and stop the sound loop.
Save Sequence: Navigate to the save page where you can name save your sequence.
Load Sequence: Navigate to the load page to open previously saved sequences.
Settings: Go to the settings page that has adjustments for the length of your sequence as well as the selected theme color.
Clear Steps: Opens prompt that lets you clear out the step grid.
Tempo Adjust: Use the arrows to move the tempo up or down. Range is 30 to 180 BPM.
Equalizer Display: Shows a real-time equalizer visual of the sound currently playing.
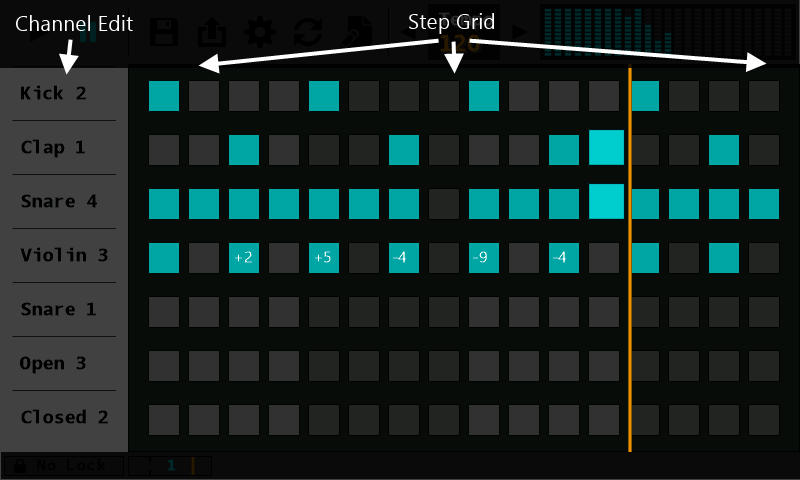
 Channel Edit:
 Tap here to bring up the channel edit popup. From the popup you can make many changes to the sound being played. This is where you can change the selected sample, make adjustments to a synth, as well as make volume adjustments.
Step Grid: Tap a square in the step grid and a sound will play when the timing bar passes over it. Can also edit the pitch of a step by first tapping the step edit button, tapping a step, and then adjusting the pitch in the step edit popup.
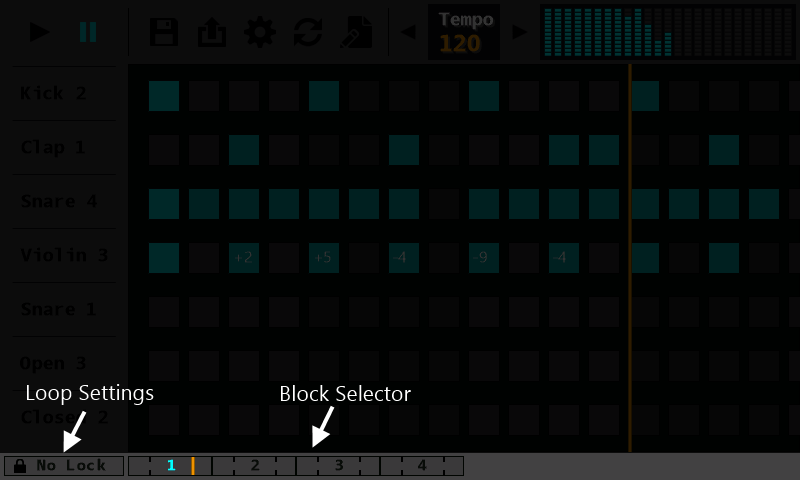
 Loop Settings:
 Tap here to bring up the loop selection popup. From here you can select a range of your sequence to play. This is good for isolating a section of your beat for editing.
Block Selector: Use this to select which block of steps to show in the step edit grid. You can tap on the numbered sections to change the view. You can also swipe left or right in the step edit area to change the block shown. Sequencer currently supports 1 to 8 blocks.
 Sequencer Layout